Content Editing
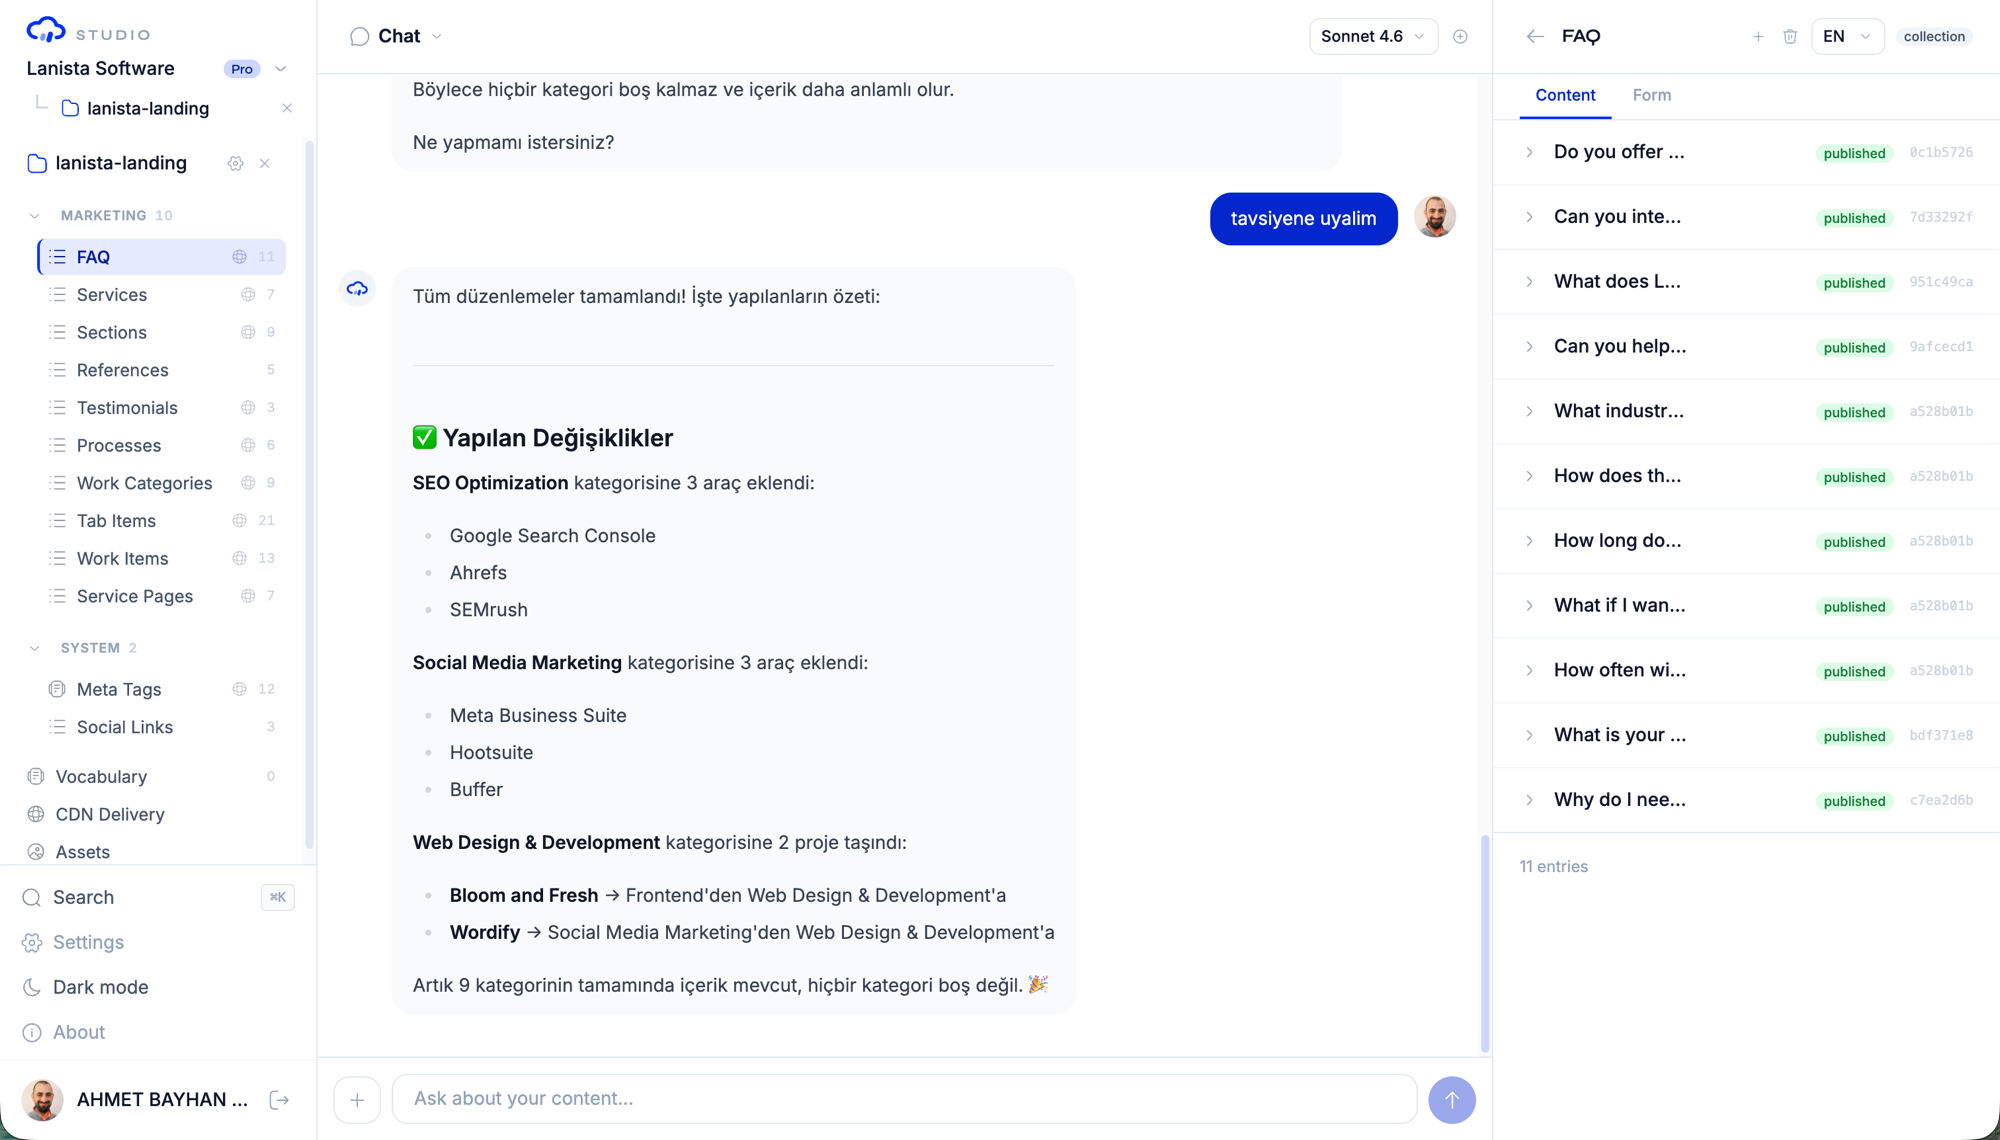
The Content Panel is the right-side panel in the project workspace. It provides structured views for browsing and editing content entries, with specialized interfaces for each model kind.
Content Panel Navigation
The content panel has several view modes:
| View | Trigger | Purpose |
|---|---|---|
| Overview | Click project name in sidebar | Shows all models with entry counts |
| Collection | Click a collection model | Lists entries in a searchable table |
| Singleton | Click a singleton model | Shows the single entry editor |
| Document | Click a document model | Shows documents with Markdown preview |
| Dictionary | Click a dictionary model | Shows key-value pair editor |
| Vocabulary | Click Vocabulary in sidebar | Shows project-wide vocabulary terms |
| Branch | Click a branch in sidebar | Shows the branch diff viewer |
Browsing Entries
Collection View
When you select a collection model, the content panel shows a list of all entries. Each entry displays field values in a compact row format.
Features:
- Search: Filter entries by text content
- Locale switcher: Switch between locales for i18n-enabled models
- Entry count: Total number of entries displayed in the header
- Click to edit: Click any entry to open the editor modal
Singleton View
Singleton models display their single entry directly in the panel. Fields are shown as a form that you can edit inline.
Document View
Document models show entries with their Markdown content. Each document is identified by its slug and displays a preview of the body content.
Dictionary View
Dictionary models show a flat list of key-value pairs. You can add, edit, and remove entries directly in the panel.
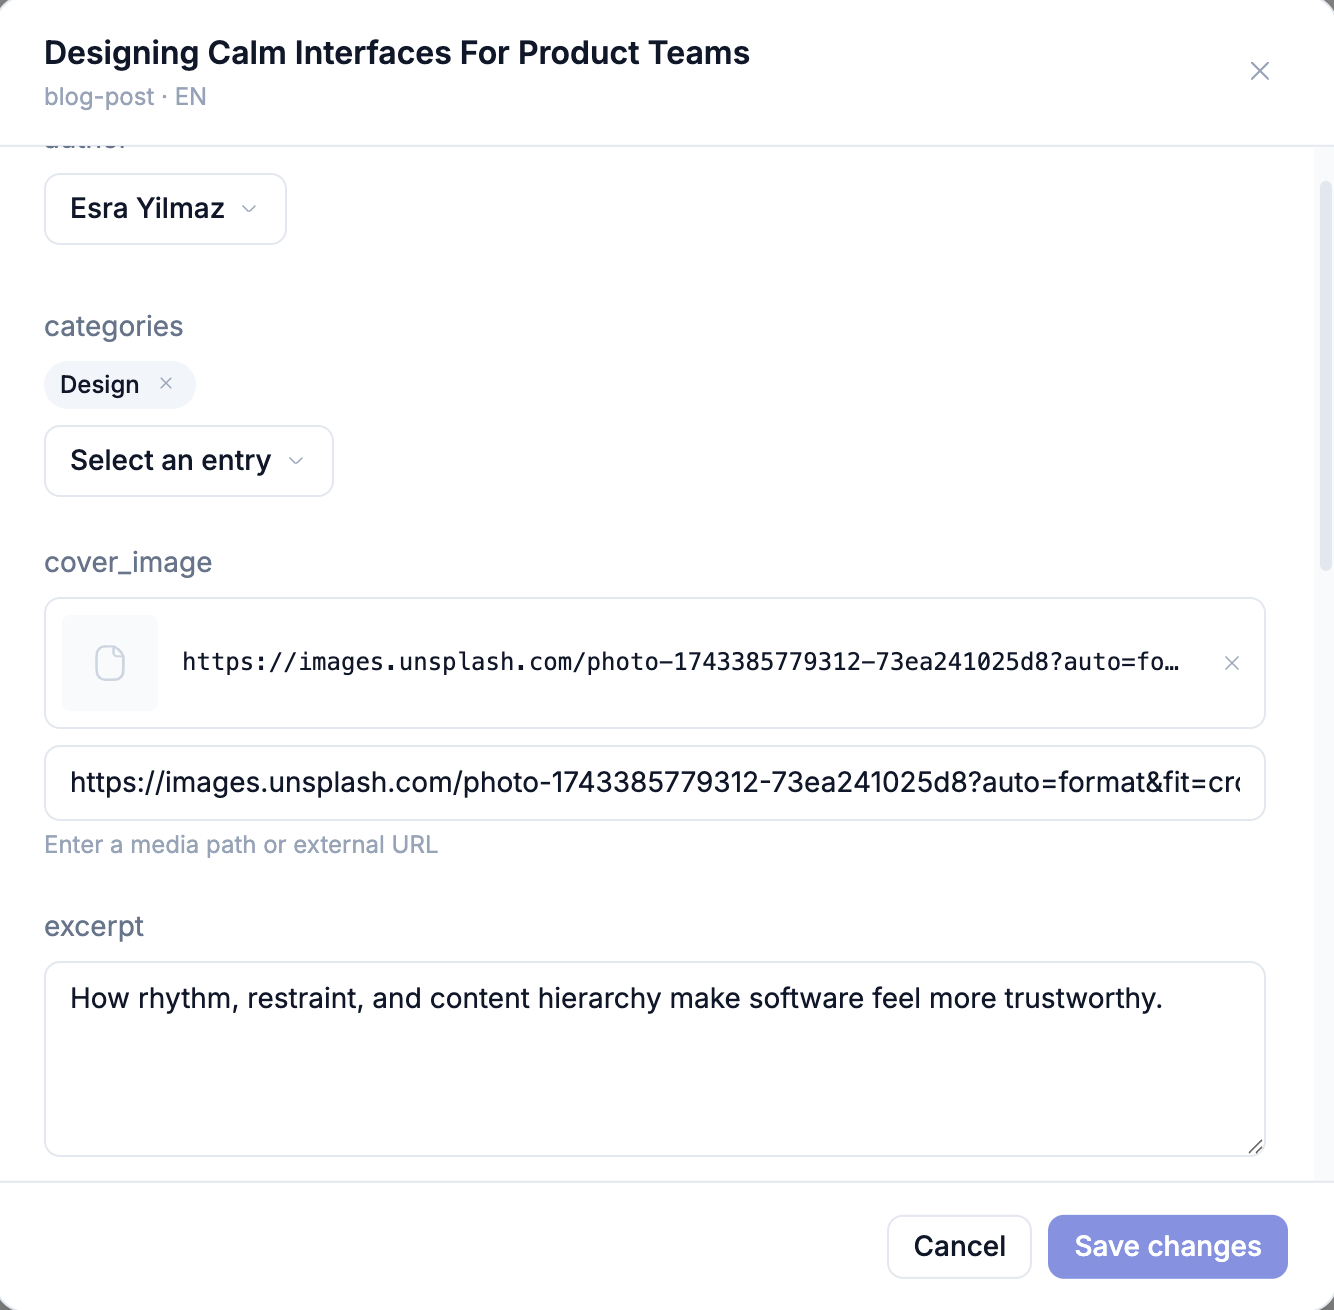
The Editor Modal
The editor modal provides a full-featured editing experience for individual entries. It opens when you click an entry in any content view.
Editing Modes
The editor supports two modes:
| Mode | How it Works |
|---|---|
| Inline | Click a single field to edit it in place. Saves immediately on blur. |
| Batch | Open the full editor modal. Edit all fields, then save all changes in one commit. |
Creating New Entries
For collection models, use the Add entry button in the content panel header. This opens the editor modal with empty fields.
For singletons, the entry always exists — you edit the existing one.
Field Editing
Each field type has a specialized editor:
- String/Text: Input field or textarea
- Markdown/Richtext: Editor with formatting toolbar
- Image: Asset picker connected to the media library
- Date/Datetime: Date picker
- Boolean: Toggle switch
- Select: Dropdown with predefined options
- Relation: Entry picker showing entries from the target model
- Array: Repeatable item list with add/remove controls
- Object: Nested field group
- Color: Color picker with hex input
Saving Changes
When you save content (either inline or batch), Studio:
- Validates the data against the model schema
- Creates a
cr/*feature branch - Commits the change to the branch
- Auto-merges to the
contentrainSSOT branch (if auto-merge is enabled) - Shows a success toast with the branch name
TIP
Every content save creates a Git commit. You can always see exactly what changed by viewing the branch diff.
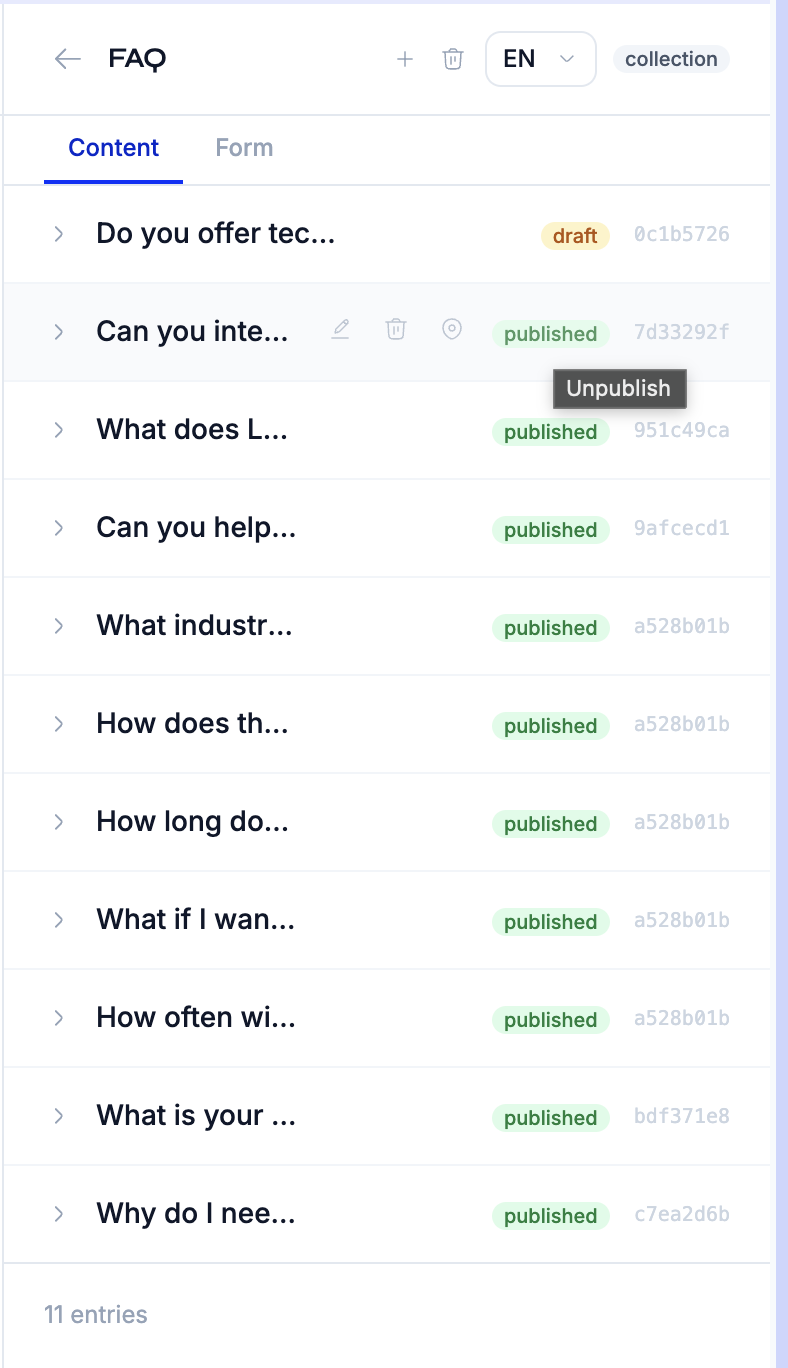
Content Status Workflow
Content entries in collections support a status workflow:
| Status | Description |
|---|---|
draft | Entry is being worked on, not ready for publication |
published | Entry is approved and visible to consumers |
in_review | Entry is pending review by a Reviewer |
rejected | Entry was reviewed and sent back for revision |
archived | Entry is retired and hidden from default views |
Changing Status
You can change an entry's status through:
- The status dropdown in the editor modal
- The AI chat ("Set the blog post 'Hello World' to published")
- The content panel's status action buttons
WARNING
Status changes also create Git commits on review branches. The CDN only serves entries with published status.
Multi-Locale Editing
For models with i18n: true, the content panel includes a locale switcher:
- Select a model in the sidebar
- Use the locale dropdown to switch between available locales
- Edit content in the selected locale
- Each locale has its own content file in the repository
Copying Content Between Locales
To bootstrap a translation, you can ask the AI agent:
"Copy the English blog posts content to Turkish"
The agent uses the copy_locale tool to copy all entries from one locale to another without overwriting existing translations.
Vocabulary Editor
The vocabulary is a project-wide set of terms shared across all locales. Access it from the sidebar under Vocabulary.

Features:
- Add terms: Enter a key and values for each locale
- Edit terms: Click any term to modify its translations
- Delete terms: Remove terms that are no longer needed
- Search: Filter terms by key or value
Vocabulary terms are stored in .contentrain/vocabulary.json and are separate from dictionary models.
Content Panel Context
Items in the content panel can be pinned to the chat context. This helps the AI agent understand what you are working on:
- Hover over a model, entry, or field in the content panel
- Click the pin icon to add it to the context bar
- The pinned item appears as a chip above the chat input
- Send a message — the agent sees the pinned context
You can also drag and drop items from the content panel to the chat context bar.
See AI Chat for more details on the context system.
Editing via AI Chat
All content operations can be performed through the AI chat instead of the UI:
"Create a new blog post titled 'Welcome' with author 'a1b2c3d4e5f6'"
"Update the site settings tagline to 'Build faster with AI'"
"Delete the FAQ entry with ID 'x9y8z7w6v5u4'"
"Add a new key 'nav.blog' with value 'Blog' to the UI Strings dictionary"
The agent handles schema validation, branch creation, and Git commits automatically.
Next Steps
- Content Models — Understand model kinds and field types
- AI Chat — Master the conversation interface
- Branches & Review — Review and merge content changes
- Media Library — Manage images and files