Media Library
The media library provides a centralized place to manage all visual and file assets for your project. It supports direct uploads, URL imports, automatic image optimization, variant generation, and metadata management.
Managed service / Enterprise Edition
The media library is an Enterprise Edition feature, gated by the media.library and media.upload plan features and backed by Cloudflare R2 storage. It is available on Contentrain's managed service (Starter plans and above) and on self-hosted Enterprise Edition deployments. It is not available in the self-hosted Community Edition, which has no media storage backend.
Accessing the Library
Open the media library from:
- Sidebar: Click Assets in the project sidebar
- Command palette: Press
Cmd+Kand type "Media library"
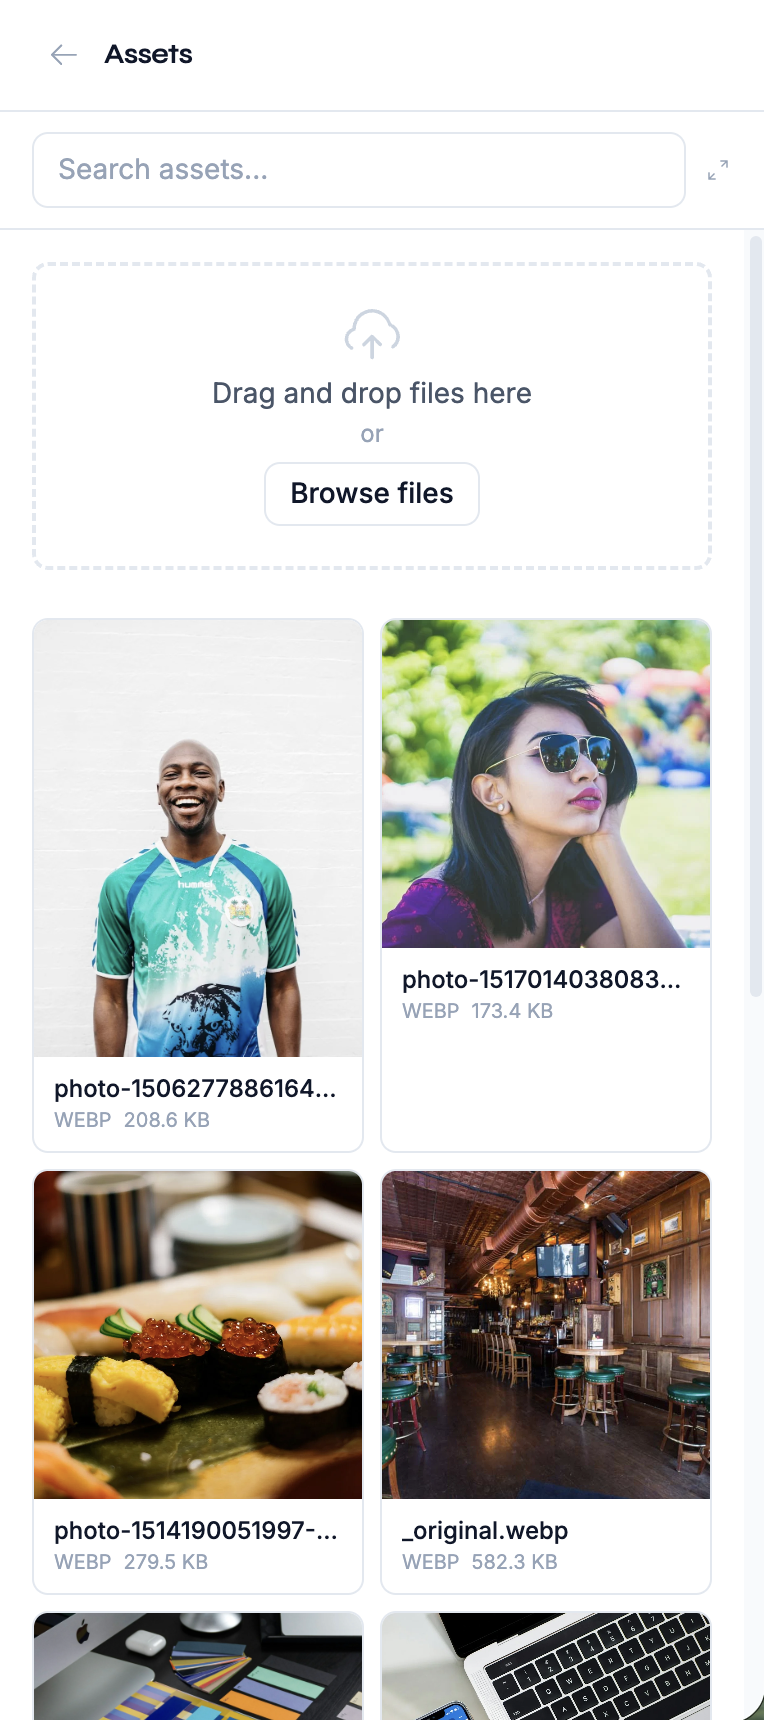
Uploading Assets
Direct Upload
- Open the media library
- Click Upload or drag and drop files onto the library area
- Optionally set alt text and tags before upload
- The file is uploaded, optimized, and variants are generated
URL Import
You can import images from external URLs:
- Click Import from URL
- Paste the image URL
- Optionally set alt text and tags
- Studio fetches, optimizes, and stores the image
Upload via AI Chat
The agent can upload images from URLs:
"Upload the image at https://example.com/hero.jpg as the hero banner
with alt text 'Product dashboard screenshot'"
Bulk Upload
Select multiple files to upload them all at once. Each file is processed individually with optimization and variant generation.
TIP
Supported formats include JPEG, PNG, WebP, GIF, SVG, MP4, and common document formats (PDF, etc.).
Image Optimization
When you upload an image, Studio automatically:
- Converts to WebP — optimal format for web delivery
- Generates variants — multiple sizes for responsive design
- Computes blurhash — low-resolution placeholder for lazy loading
- Extracts metadata — dimensions, format, file size
Variants
Each uploaded image gets a set of size variants based on the configured presets. Variants include:
| Property | Description |
|---|---|
path | Storage path for this variant |
width | Width in pixels |
height | Height in pixels |
format | Image format (typically webp) |
size | File size in bytes |
Variant presets can be customized per field when defining image fields in your content models (Pro+ plan).
Asset Metadata
Every asset in the library has the following metadata:
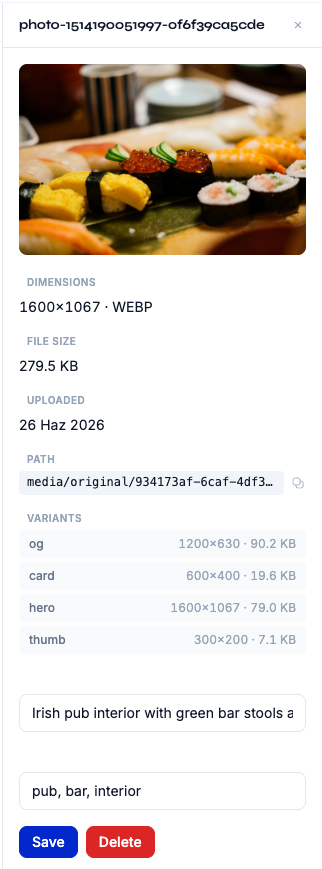
| Field | Description |
|---|---|
filename | Original file name |
contentType | MIME type (e.g., image/webp) |
size | File size in bytes |
width | Image width in pixels |
height | Image height in pixels |
format | File format |
blurhash | Low-resolution placeholder hash |
alt | Alt text for accessibility |
tags | Array of organizational tags |
source | How the asset was uploaded |
variants | Generated size variants |
Editing Metadata
To update an asset's metadata:
- Click on an asset in the library to select it
- The detail panel shows the asset preview and metadata
- Edit the alt text, tags, or focal point
- Changes save automatically
WARNING
Always add descriptive alt text to images. It improves accessibility and helps the AI agent understand your media assets.
Browsing and Filtering
The media library provides several ways to find assets:
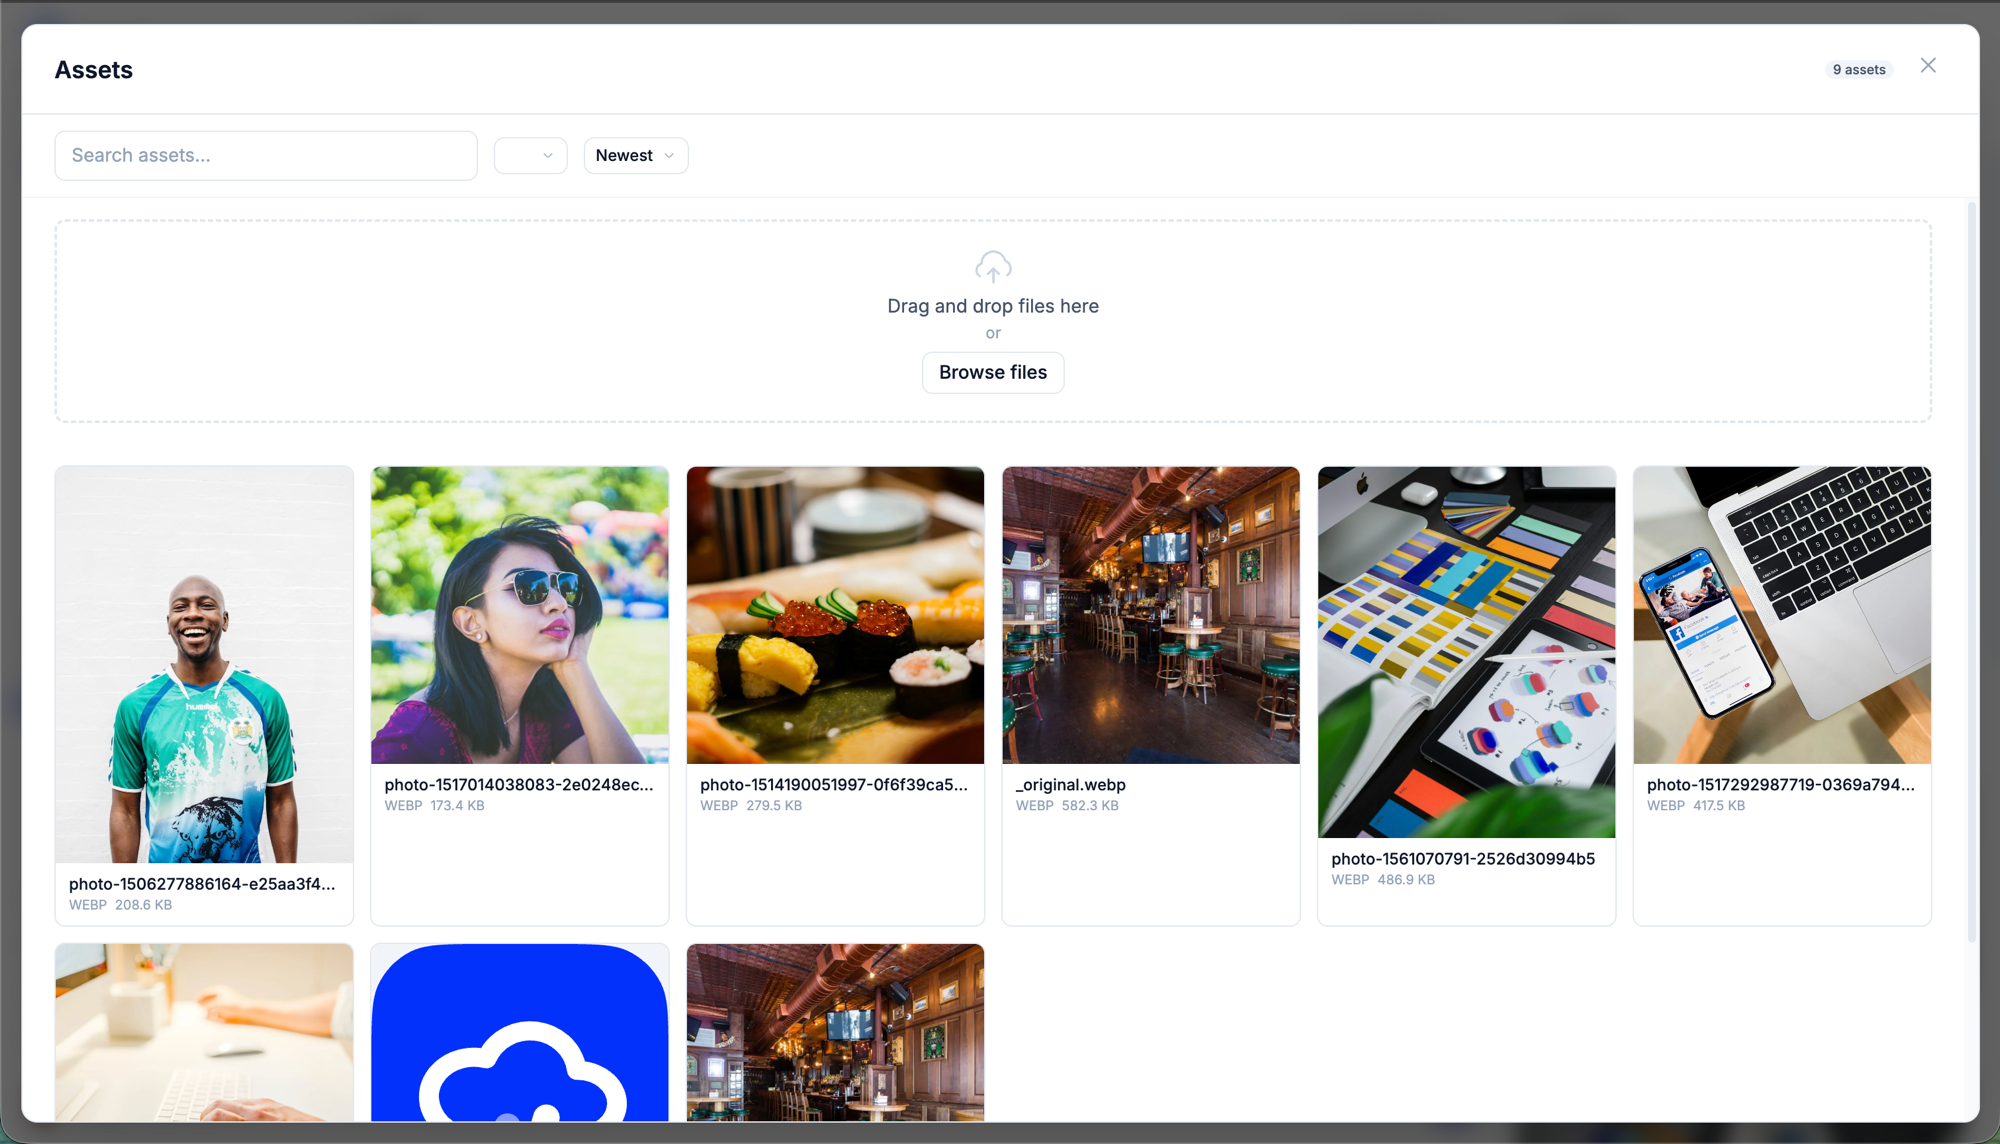
Search
Type in the search bar to filter by filename, alt text, or tags.
Filter by Type
Filter assets by type:
- All — Show all assets
- Images — JPEG, PNG, WebP, GIF, SVG
- Videos — MP4, WebM
- Files — PDF, documents
Filter by Tags
Click on tags to filter assets that have specific tags applied.
Sort Order
Sort assets by:
| Sort | Description |
|---|---|
| Newest | Most recently uploaded first (default) |
| Oldest | Oldest uploads first |
| Name | Alphabetical by filename |
| Size | Largest files first |
Pagination
The library loads 50 assets per page. Use pagination controls to browse through larger libraries.
Asset Preview
Click any asset to open a detailed preview:
- Full-size preview — View the asset at its original dimensions
- Metadata panel — See all properties including dimensions, format, and variants
- Edit controls — Update alt text, tags, and focal point
- Usage info — See where the asset is referenced in your content
Using Assets in Content
image, video, and file fields store a string reference — there is no separate visual asset picker in v1. In the content editor (see the editor modal), enter a media path or external URL for the field:
- A media library path, e.g.
media/original/abc123.webp - An external URL, e.g. a CDN or Unsplash link
Via AI Chat
You can also reference media assets through the chat:
"Set the blog post cover image to the hero banner from the media library"
"Search for images tagged 'team' and use the first one as the about page photo"
The agent uses search_media and get_media tools to find assets and save_content to set image field values.
Deleting Assets
To delete an asset:
- Select the asset in the library
- Click Delete in the detail panel
- Confirm the deletion
To delete multiple assets:
- Select multiple assets using checkboxes
- Click Delete selected
- Confirm the bulk deletion
WARNING
Deleting an asset does not automatically remove references to it in your content. Content fields that reference a deleted asset will show a broken reference.
Plan Limits
Media library features vary by plan:
| Feature | Free | Starter | Pro | Enterprise |
|---|---|---|---|---|
| Browse library | — | Yes | Yes | Yes |
| Upload | — | Yes | Yes | Yes |
| Storage | — | 1 GB | 15 GB | 100 GB |
| Max file size | — | 5 MB | 50 MB | 100 MB |
| Variants per field | — | 4 | 10 | Unlimited |
| Custom variants | No | No | Yes | Yes |
Next Steps
- Content Editing — Use media assets in your content
- AI Chat — Upload and manage assets through conversation
- CDN — Deliver optimized assets through the CDN