Projects
A project in Contentrain Studio connects a GitHub repository to the content management system. Each project has its own content models, entries, branches, media library, and team members.
Creating a Project
There are two ways to create a project from your workspace dashboard.
Connecting an Existing Repository
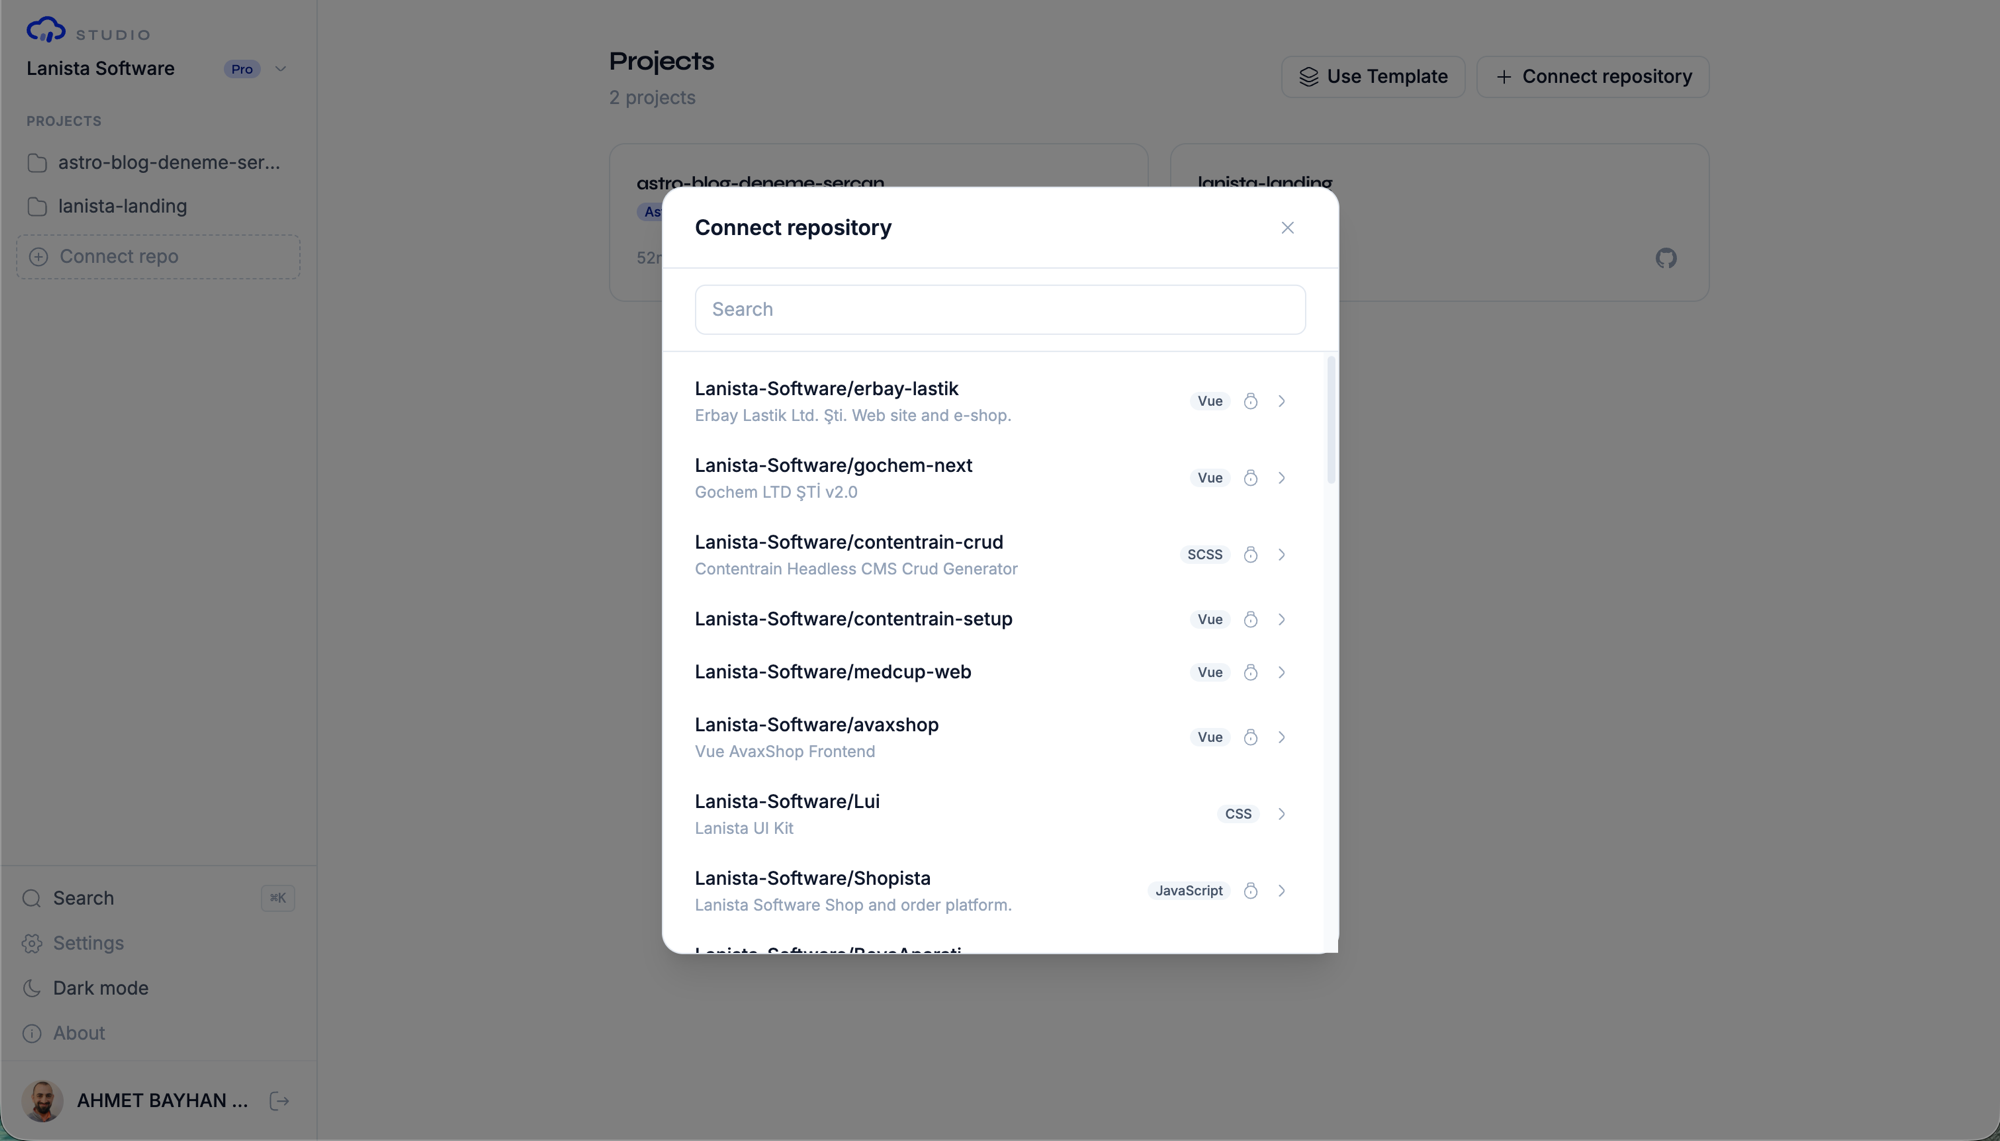
Use this option when you already have a repository (with or without Contentrain configuration):
- From the workspace dashboard, click Connect Repository
- If the GitHub App is not installed, you will be prompted to install it first
- Select a repository from the list of available repos
- Studio scans the repository for existing
.contentrain/configuration - Review the scan results (detected stack, existing content, i18n settings)
- Click Connect to create the project
The dialog follows a state machine flow:
| Step | What Happens |
|---|---|
| Install | Shown if no GitHub App installation exists — links to GitHub App setup |
| Select | Browse and search your repositories, filter by name |
| Confirm | Review scan results (stack detection, content directory) and confirm |
TIP
You can search your repositories by name in the selection step. Studio shows the repository name, visibility (public/private), default branch, language, and last update date.
Starting from a Template
Use this option to create a new repository from a pre-configured starter kit:
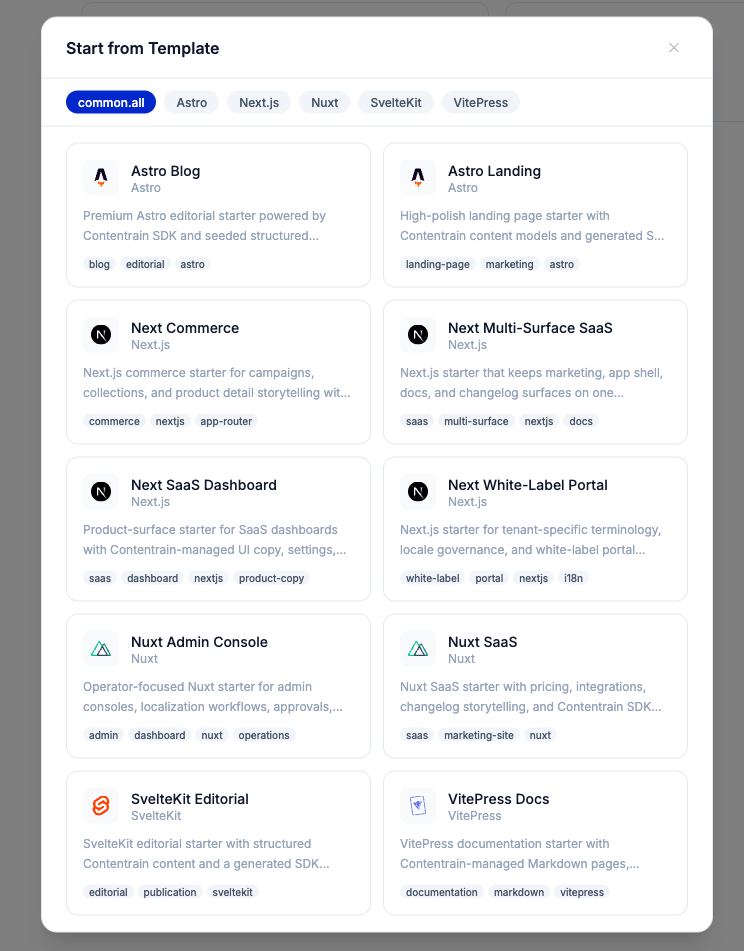
- From the workspace dashboard, click Use Template
- Browse available starter kits, optionally filter by framework
- Select a template
- Enter a repository name and choose visibility (public/private)
- Studio creates the repository from the template and connects it as a project
Available framework filters include Astro, Nuxt, Next.js, SvelteKit, VitePress, and more.
GitHub App Requirements
Studio requires the Contentrain GitHub App to be installed on your GitHub account or organization:
- Repository access: The app needs read/write access to repository contents and metadata
- Selective access: You can choose which repositories the app can access
- Organization support: Install on your personal account or any organization you administer
- Reconfiguration: You can change repository access at any time from GitHub settings
WARNING
Without the GitHub App installation, you cannot connect repositories or create projects. The workspace dashboard will show an empty state prompting you to install the app.
The Three-Panel Layout
When you open a project, Studio presents a three-panel workspace:
┌──────────────┬──────────────────┬──────────────────────┐
│   Sidebar    │    Chat Panel    │   Content Panel      │
│   (240px)    │                  │   (400px)            │
│              │                  │                      │
│  Models      │  AI conversation │  Browse & edit       │
│  Branches    │  with tool calls │  content entries     │
│  Vocabulary  │                  │                      │
│  Navigation  │                  │                      │
└──────────────┴──────────────────┴──────────────────────┘
Sidebar
The sidebar provides navigation for the project:
- Models: List of all content models, grouped by domain
- Branches: Pending
cr/*content branches awaiting review - Vocabulary: Project-wide vocabulary terms
- CDN: Content delivery settings
- Media: Asset library
- Settings: Project configuration
Clicking a model in the sidebar opens it in the Content Panel. Clicking a branch opens the branch diff viewer.
Chat Panel
The center panel is the AI conversation interface. You can:
- Send messages to the AI agent
- View tool call results inline
- Switch between AI models (Haiku, Sonnet, Opus)
- Pin context items from the Content Panel
- Browse conversation history
See AI Chat for the full guide.
Content Panel
The right panel displays content based on your current context:
- Overview: Project summary with model list and entry counts
- Model view: Content entries for the selected model
- Branch view: Visual diff of changes on a branch
- Vocabulary view: Key-value term editor
See Content Editing for details.
Project Initialization
When you connect a repository that does not have a .contentrain/ directory, the project enters an uninitialized state. You can initialize it in two ways:
Via Chat
Ask the AI agent to initialize the project:
"Initialize this project with a blog collection model and English locale"
The agent will create the .contentrain/ configuration structure, including config.json, model definitions, and empty content files.
Via Starter Template
If you created the project from a starter template, it comes pre-initialized with models and sample content.
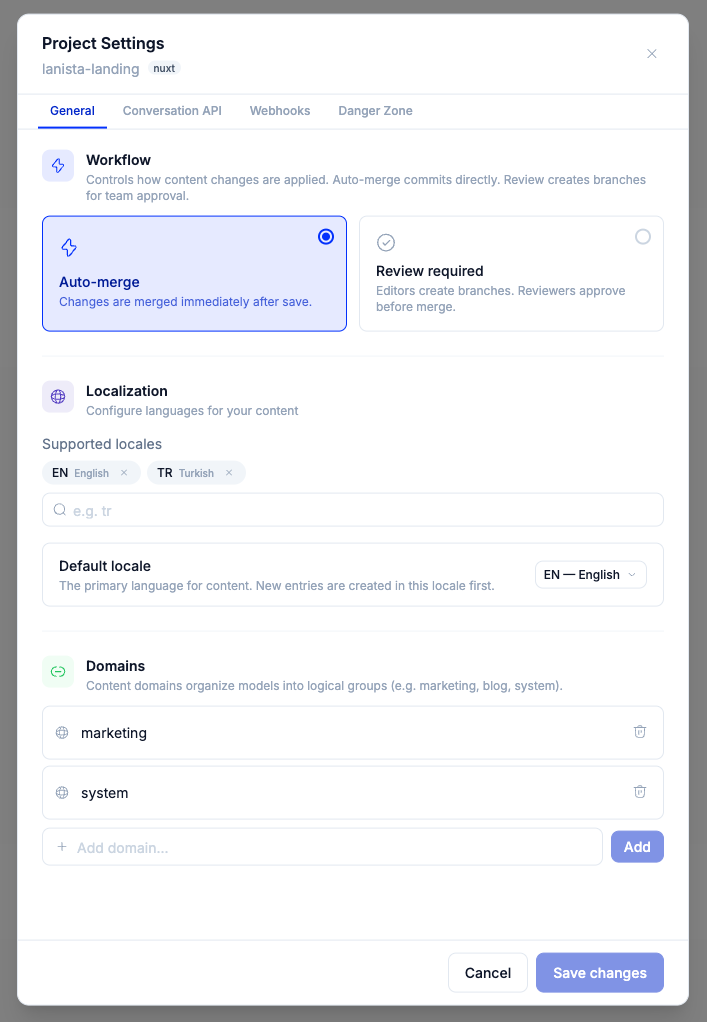
Project Settings
Access project settings from the sidebar gear icon or through the command palette. The modal is organized into tabs:
- General: workflow mode (auto-merge or review), supported locales and the default locale, and content domains
- Conversation API: manage Conversation API keys (Enterprise Edition)
- Webhooks: outbound webhook endpoints (Enterprise Edition)
- Danger zone: delete the project (removes it from Studio; the repository itself is not deleted)
Project-level member assignment (Editor / Reviewer / Viewer) lives in Workspace Settings → Members → Project Access, not here.
Project Health
Studio tracks project health metrics including:
- Content validation status
- Model schema consistency
- Branch count and cleanup recommendations
- Locale parity across models
Access the health dashboard from the sidebar or command palette (Project health).

Deleting a Project
To delete a project:
- Open project settings
- Scroll to the Danger Zone
- Click Delete project
- Confirm the action
WARNING
Deleting a project removes it from Studio and cleans up associated data (branches, media references, form submissions). The GitHub repository itself is not deleted.
Next Steps
- Content Models — Define schemas for your content
- AI Chat — Use the conversation interface to manage content
- Content Editing — Browse and edit entries in the content panel